Ah! Reading thermometers! Something that we take for granted everyday involves so many literacy skills that it can really be a challenge.
First we have to understand how to read numbers. Then we need to comprehend that a series of numbers can be read not only horizontally (e.g. in a poster) but also vertically. Then we must make the connection that a small line represents one number. Most thermometers do not have every number marked, they only have lines. My thermometer has numbers marked by 10s (e.g. 0, 10, 20, 30 etc.). Making the leap from reading a numbered line to an unnumbered line can be quite a challenge. Here is what I recently did to help my students read our outdoor thermometer.
1. Get the numbers down. Read them in order, do cloze exercises with the number sequences, etc.
2. Demonstrate on the board that numbers can be read vertically (upwards) and practice reading this together. Have students present it.
3. Put notches / lines beside each number and read it again.
4. Erase some numbers and have students write the missing numbers.
5. Discuss what a thermometer is. I did this by bringing my thermometer into the kitchen and putting it in the freezer to see the colour move down, and then run it under hot water to see it rise. This demonstrates the concept well.
6. On the board draw a thermometer and explain how the "colour stops" at a number and that is the temperature. Do a few examples and have students read the numbers.
7. I printed off worksheets from here: http://worksheetgenius.com/html/thermometers.php
8. Return to the board and erase the middle numbers and mark it only by 5s or by 10s and draw the temperatures again.
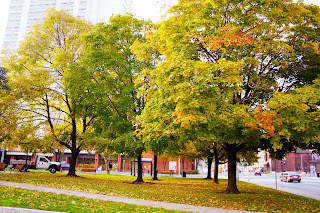
Ideally this would be started in the fall or the spring when the temperatures are not yet in the minus numbers.
You could also create your own paper thermometers for a hands-on practice of reading thermometers. I would suggest write lines for each number.
Outomes: Read numbers, Read temperatures, write numbers, listen and show temperature, follow instructions
Saturday, 10 March 2012
Wednesday, 15 February 2012
Amaryllis Bulbs
There is nothing quit like getting your hands dirty when it comes to learning ESL!
In November there are endless supplies of forced bulb kits that you can purchase in local garden centres or grocery stores. It is wise to compare prices so that you can get a deal, and do not blow your budget doing this kind of project.
This year I chose to do one plant for my morning class and one for my afternoon class rather than one plant for each student. At the end of the term, students entered their name in a draw to take the plant home.
To start, I discussed all the relevant vocabulary with my students including soil, a pot and saucer, bulb, water, and roots. This could be done orally only or supported with a diagram to label. I explained the process of what we would do orally.
Inspired by horticultural therapy workshops I have attended, I had the students dump the soil into a big pot and slowly add nice, warm water from a pitcher to the soil. Students then mixed up the soil with their bare hands. You could provide gloves. It is always best to start with moist soil.
Then we poured about three quarters of the soil into the pot, nestled the bulb in, and filled in the space with the rest of the soil. Finishing up with a thorough watering, we were set to let more language learning happen.
At this point you could have the students describe the the process to you and write the simple directions using a Language Experience Approach.
This year, we started a measurement chart. Each Monday we would write the date, and measure the growth of the plant using a ruler in centimetres. This continued for four weeks. Longer would have been better as we did not end up seeing our amaryllis bulbs bloom. The lucky draw winner was able to have it bloom in her house.
We reviewed the chart weekly, learned how to read and write in a chart and built competency in measuring using a ruler.
Outcomes: Listen to and follow instructions, copy words and sentences, use a ruler to measure height, read and write numbers, read and write in a chart.
Monday, 23 January 2012
Clove and Orange Pomander
Ever since grade 3 I have been making orange and clove pomanders for Christmas. My school teacher introduced this activity in class in 1985 and for some reason it really stuck with me. Perhaps it was the hands-on-ness, or the wonderful smell. I have made these in my ESL classes a few times, and each time was a success.
This year, my centre held an end of the year celebration (as there are diverse religious groups at the centre). I chose to lead this activity with the adult students and presented it as a natural air freshener for the kitchen or bathroom. I googled the history (e.g. on Wikipedia here), but decided not to go into too much detail during this celebration activity. I also showed some design ideas as mentioned below. This activity was done close to the end of the day and students were wanting to leave early, but when I showed them the task, they were quite interested. All the levels of students (e.g. from Literacy to LINC Level 5) sat together and worked on their own pomanders while chatting with each other and showing off their creations. The room smelled incredible and we were relaxed and just making stuff! Amazing!
A tip I have learned over the years is to start with pushing in 4 cloves at the top of the orange and another 4 at the bottom of the orange. This creates sturdy 'posts' to wrap the ribbon or yarn through. The ribbon will not slid around and off the orange. With the ribbon secured, I then develop the pattern I want with the remaining cloves. There are many image ideas on the web if you do an image search for orange and clove pomanders.
Outcomes: Listen to and follow instructions, ask for help, help peers, conceptualize and create a pattern
This year, my centre held an end of the year celebration (as there are diverse religious groups at the centre). I chose to lead this activity with the adult students and presented it as a natural air freshener for the kitchen or bathroom. I googled the history (e.g. on Wikipedia here), but decided not to go into too much detail during this celebration activity. I also showed some design ideas as mentioned below. This activity was done close to the end of the day and students were wanting to leave early, but when I showed them the task, they were quite interested. All the levels of students (e.g. from Literacy to LINC Level 5) sat together and worked on their own pomanders while chatting with each other and showing off their creations. The room smelled incredible and we were relaxed and just making stuff! Amazing!
A tip I have learned over the years is to start with pushing in 4 cloves at the top of the orange and another 4 at the bottom of the orange. This creates sturdy 'posts' to wrap the ribbon or yarn through. The ribbon will not slid around and off the orange. With the ribbon secured, I then develop the pattern I want with the remaining cloves. There are many image ideas on the web if you do an image search for orange and clove pomanders.
Outcomes: Listen to and follow instructions, ask for help, help peers, conceptualize and create a pattern
Labels:
Beautiful Things,
Christmas,
CLB 2,
CLB 4,
CLB 5,
cloves,
Foundation,
orange,
Phase 1,
Phase 2,
Phase 3
Wednesday, 28 December 2011
A Reason, A Season or a Lifetime
I was first introduced to this poem during a Horticultural Therapy training session I attended a few years ago. This poem has stayed with me over the years. I have recently thought about it in the context of one of my previous students now suffering from ALS. While she only attended school for one year, she was quite a bright woman. She took her time learning a skill or a topic, but once she understood it, she remembered it for a long time. In a recent visit to her in her home we were talking about what a great memory she has. She beamed as this trait was recognized by me and her family members. I am quite sad that she will no longer be able to attend school; however, I am grateful that she did experience the successes and growth that she did while in my class. I have not decided where she fits in the classifications of this poem, but she has definitely changed me and my life.
A Reason, a Season or a Lifetime
People come into your life for a reason, a season or a lifetime.
When you figure out which one it is,
you will know what to do for each person.
A Reason, a Season or a Lifetime
People come into your life for a reason, a season or a lifetime.
When you figure out which one it is,
you will know what to do for each person.
When someone is in your life for a REASON,
it is usually to meet a need you have expressed.
They have come to assist you through a difficulty;
to provide you with guidance and support;
to aid you physically, emotionally or spiritually.
They may seem like a godsend, and they are.
They are there for the reason you need them to be.
it is usually to meet a need you have expressed.
They have come to assist you through a difficulty;
to provide you with guidance and support;
to aid you physically, emotionally or spiritually.
They may seem like a godsend, and they are.
They are there for the reason you need them to be.
Then, without any wrongdoing on your part or at an inconvenient time,
this person will say or do something to bring the relationship to an end.
Sometimes they die. Sometimes they walk away.
Sometimes they act up and force you to take a stand.
What we must realize is that our need has been met, our desire fulfilled; their work is done.
The prayer you sent up has been answered and now it is time to move on.
this person will say or do something to bring the relationship to an end.
Sometimes they die. Sometimes they walk away.
Sometimes they act up and force you to take a stand.
What we must realize is that our need has been met, our desire fulfilled; their work is done.
The prayer you sent up has been answered and now it is time to move on.
Some people come into your life for a SEASON,
because your turn has come to share, grow or learn.
They bring you an experience of peace or make you laugh.
They may teach you something you have never done.
They usually give you an unbelievable amount of joy.
Believe it. It is real. But only for a season.
because your turn has come to share, grow or learn.
They bring you an experience of peace or make you laugh.
They may teach you something you have never done.
They usually give you an unbelievable amount of joy.
Believe it. It is real. But only for a season.
LIFETIME relationships teach you lifetime lessons;
things you must build upon in order to have a solid emotional foundation.
Your job is to accept the lesson, love the person,
and put what you have learned to use in all other relationships and areas of your life.
It is said that love is blind but friendship is clairvoyant.
things you must build upon in order to have a solid emotional foundation.
Your job is to accept the lesson, love the person,
and put what you have learned to use in all other relationships and areas of your life.
It is said that love is blind but friendship is clairvoyant.
— Unknown
Saturday, 17 December 2011
Mum Show
As summer air turns cool, mums start showing their colours in our gardens. Many houses in the neighbourhood around school have these little bursts of colour that last long into the fall months. Recognizing these flowers and seasonal importance of them can be a lot of fun. Going for colour-hunt walks or taking a trip to the local Mum Show are two ways to celebrate the beauty of the changing seasons.
For the past few years my students and I have taken a local bus to visit the Mum Show at a greenhouse downtown. The Mum Show displays a variety of colours and species of mums - much more than the usual garden varieties we see around town. There is also a year-round tropical greenhouse. Students always bring their cameras and take many beautiful pictures of themselves, their friends and the flowers.
The tropical greenhouse houses many plants from countries my students are from. There are birds, geckos, fish and a turtle. The humidity in the room, the fresh air, and sound of the flowing water make for a relaxing and peaceful environment. This provides an opportunity to reconnect with the nature that is familiar.
My students use the time at the greenhouse to explore and experience it alone or with their peers. In my mind, it is such a great opportunity to experience a part of our city - a part that they may have never heard of or seen before. The actual structured language aspect comes afterwards in class. This year, I also wandered alone through the greenhouses snapping shots such as the ones below to use as the language focus the following day in class.
With these photos we reviewed the names of the colours (red, yellow, pink, etc.) and put them in sentences such as, "I see red flowers", and so on. From there, we sequenced the photos in a wall pocket chart, wrote sentences, matched the sentences and copied them onto small sentence strips. Students then created books for this story.
Outcomes: name colours, sequence pictures from top to bottom and left to right, read words, copy words from a distance, listen to and follow instructions.
Thursday, 24 November 2011
Leaf Rubbings
What would the fall be without making leaf rubbings? I have done this on my own and with my students for many years. I have a pretty good stash of leaves collected that I reuse, but I am finding that over time they dry out and get brittle. I will have to replace them next year - maybe we'll have to go on a leaf walk!
This year, I finally realized how to overcome the struggle of the leaves moving under the paper while we colour on top. The solution??? Tape! Yes, tape the stem of the leaf (vein side up) to the paper. That way, the leaf will not slide around and the tape does not show. This makes for a much easier time in doing the leaf rubbing and you will have one solid line for the edges.
I encourage my students to be creative in the colours they choose. They do not need to stay with the tried and true fall colours of red, yellow, orange and brown. Many beautiful leaves were made with blues and purples too.
Outcomes: listen to and follow instructions, name colours, cut out shapes using scissors.
When we each finished 3-4 leaves, we cut them out and taped them up on the walls around the classroom. This adds a great fall feel to the room, as well as some colour, and amazing student work!
Monday, 21 November 2011
Leaf Walk
In the beautiful fall air, it is such a nice treat to go outside for a walk especially when the sun is shining. With worksheets in hand, my students and I went out for a scavenger hunt for specific numbers and colours of leaves. We walked to a park close to our school, shuffled through the leaves, selected the right colours and amounts, and headed back to the school to debrief about our findings.
Outcomes: Listen to and follow instructions, read common nouns, read and understand descriptive adjectives, count items, orally describe items found.
The handout that we used was a bit challenging for my foundation level students. I would adapt it by making a simple chart with one column for the colour, and one column for the number of leaves wanted.
Upon returning to the classroom, there was some debate as to exactly what colour some leaves were - was it really red, or was it more of an orange? Was it orange or really a yellow? While the answer does not really matter, the language that came out of this discussion was excellent.
A great follow-up activity would be to do leaf rubbings (see up-coming posting). In the spring, you could a similar activity with colours of flowers or shapes of leaves (e.g. maple versus oak, etc).
Subscribe to:
Posts (Atom)