Showing posts with label Foundation. Show all posts

Monday, 30 December 2013

Winter Wishes

The end of the year celebration at school usually includes all students at all levels. The teachers tap into their creativity to meet the needs of the learners. This year, our students ranged from Literacy Foundation to CLB 6. To start off our morning, we designed an activity that included some student collaboration, speaking, fine motor skills, following instructions, and writing.

We started by having students put together a puzzle.


I designed the puzzle in Word, saved it in Adobe, and printed it as a poster. I enlarged it to about 375%, so it printed off into sixteen squares. The images I chose were not distinct enough, and we decided to add colours. Students used the colours to determine how the lines matched up. I gave them some clues such as that the puzzle was 4 x 4 squares. I also put up squares six and seven to get them started. Students of all levels participated in this.

This puzzle had the question for our next activity. First, each student expressed their own answers. Some students required a sentence starter, and others said a few sentences.

Then, we moved on to writing our sentences and decorating some winter-themed images.


Teachers and higher level students assisted lower level writers by writing down the learners' sentences or words. Students then copied their message onto the paper.


Happy new year to you all! I hope your winter wishes come true too!

Wednesday, 17 April 2013

Hug a Tree! or Just Paint One for Earth Day!

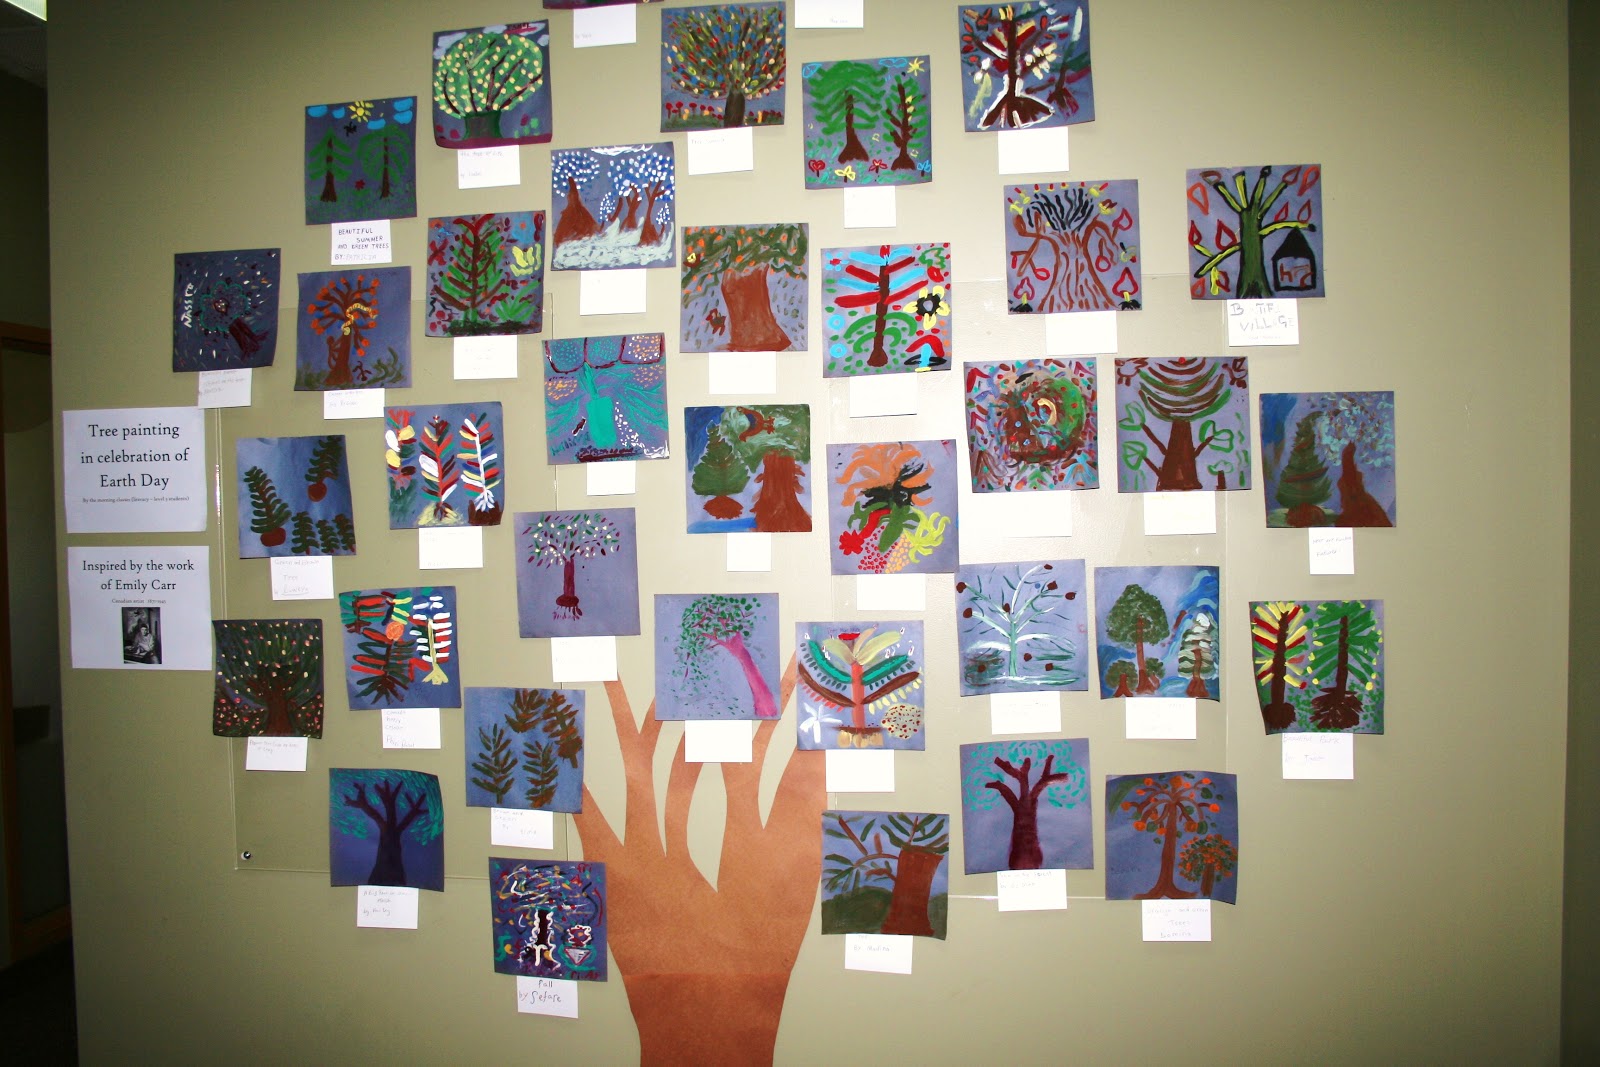
Concentration and creativity joined hands this Earth Day as students tried their hand at painting trees inspired by the late Emily Carr. My peer, B.B., guided the learners through Emily Carr images and noted how the painted lines showed movement. She found the idea for this project here: http://www.kinderart.com/arthistory/emilycarr.shtml.

The learners did 'air writing' of the movement, just tracing the shapes and lines in the air. Then the students got to it.


What really amazed me were the different interpretations of what a tree is.


 We then made a tree of all the trees.


It was interesting to see how people from different areas of world painted different styles of trees. The 'tree' in their mind was certainly not from the same corpus as Emily Carr's! What beautiful designs!

Amazingly, at our local art gallery an Emily Carr exhibit was showing at this time. This show was also featured in the local newspaper. A few teachers and a few students ventured out after school hours (during the free hours at the gallery) to visit the exhibit and experience Carr's art work in a new environment.  

Two of my colleagues, B.B. and A.B., entered this project into the TESL Ontario ESL Week Contest and won first place in the Photo/Collage Category! Here is a link to their outstanding work: http://www.teslontario.net/sites/default/files/webform/eslweek_instructors/Immigrant%20Women%27s%20Centre.jpg

Follow up activities can be found here:
Best of the Reader: Aboriginal People (graded stories of adults): http://www.bestofthereader.ca/Ebooks/Canada%27s_Aboriginal_People.pdf
Vancouver Art Gallery Educational Resources (may need to be adapted): http://www.museevirtuel-virtualmuseum.ca/sgc-cms/expositions-exhibitions/emily_carr/en/index.php 

Sunday, 7 April 2013

Teaching ESL Literacy Foundation and Phase I Webinar

Check out my Teaching ESL Literacy Foundation and Phase I Webinar posted in Tutela.ca at http://tutela.ca/ViewContentItem?itemId=5206. Tutela is a "National Online Repository and Community of Practice". Free membership is required, but it is a wonderful resource for all ESL teachers. I fully recommend it!

Monday, 23 January 2012

Clove and Orange Pomander

Ever since grade 3 I have been making orange and clove pomanders for Christmas. My school teacher introduced this activity in class in 1985 and for some reason it really stuck with me. Perhaps it was the hands-on-ness, or the wonderful smell. I have made these in my ESL classes a few times, and each time was a success.

This year, my centre held an end of the year celebration (as there are diverse religious groups at the centre). I chose to lead this activity with the adult students and presented it as a natural air freshener for the kitchen or bathroom. I googled the history (e.g. on Wikipedia here), but decided not to go into too much detail during this celebration activity. I also showed some design ideas as mentioned below. This activity was done close to the end of the day and students were wanting to leave early, but when I showed them the task, they were quite interested. All the levels of students (e.g. from Literacy to LINC Level 5) sat together and worked on their own pomanders while chatting with each other and showing off their creations. The room smelled incredible and we were relaxed and just making stuff! Amazing!


A tip I have learned over the years is to start with pushing in 4 cloves at the top of the orange and another 4 at the bottom of the orange. This creates sturdy 'posts' to wrap the ribbon or yarn through. The ribbon will not slid around and off the orange. With the ribbon secured, I then develop the pattern I want with the remaining cloves. There are many image ideas on the web if you do an image search for orange and clove pomanders.


Outcomes: Listen to and follow instructions, ask for help, help peers, conceptualize and create a pattern

Saturday, 17 December 2011

Mum Show


As summer air turns cool, mums start showing their colours in our gardens. Many houses in the neighbourhood around school have these little bursts of colour that last long into the fall months. Recognizing these flowers and seasonal importance of them can be a lot of fun.  Going for colour-hunt walks or taking a trip to the local Mum Show are two ways to celebrate the beauty of the changing seasons.

For the past few years my students and I have taken a local bus to visit the Mum Show at a greenhouse downtown. The Mum Show displays a variety of colours and species of mums - much more than the usual garden varieties we see around town. There is also a year-round tropical greenhouse. Students always bring their cameras and take many beautiful pictures of themselves, their friends and the flowers.

The tropical greenhouse houses many plants from countries my students are from. There are birds, geckos, fish and a turtle. The humidity in the room, the fresh air, and sound of the flowing water make for a relaxing and peaceful environment. This provides an opportunity to reconnect with the nature that is familiar.

My students use the time at the greenhouse to explore and experience it alone or with their peers. In my mind, it is such a great opportunity to experience a part of our city - a part that they may have never heard of or seen before. The actual structured language aspect comes afterwards in class. This year, I also wandered alone through the greenhouses snapping shots such as the ones below to use as the language focus the following day in class.


With these photos we reviewed the names of the colours (red, yellow, pink, etc.) and put them in sentences such as, "I see red flowers", and so on. From there, we sequenced the photos in a wall pocket chart, wrote sentences, matched the sentences and copied them onto small sentence strips. Students then created books for this story. 


Outcomes: name colours, sequence pictures from top to bottom and left to right, read words, copy words from a distance, listen to and follow instructions.


Thursday, 24 November 2011

Leaf Rubbings


What would the fall be without making leaf rubbings? I have done this on my own and with my students for many years. I have a pretty good stash of leaves collected that I reuse, but I am finding that over time they dry out and get brittle. I will have to replace them next year - maybe we'll have to go on a leaf walk!

This year, I finally realized how to overcome the struggle of the leaves moving under the paper while we colour on top. The solution??? Tape! Yes, tape the stem of the leaf (vein side up) to the paper. That way, the leaf will not slide around and the tape does not show. This makes for a much easier time in doing the leaf rubbing and you will have one solid line for the edges.

I encourage my students to be creative in the colours they choose. They do not need to stay with the tried and true fall colours of red, yellow, orange and brown. Many beautiful leaves were made with blues and purples too.

Outcomes: listen to and follow instructions, name colours, cut out shapes using scissors.

When we each finished 3-4 leaves, we cut them out and taped them up on the walls around the classroom. This adds a great fall feel to the room, as well as some colour, and amazing student work!

Monday, 21 November 2011

Leaf Walk


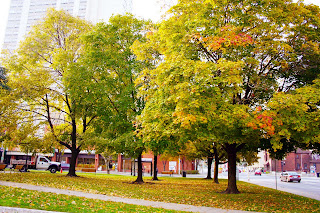
In the beautiful fall air, it is such a nice treat to go outside for a walk especially when the sun is shining. With worksheets in hand, my students and I went out for a scavenger hunt for specific numbers and colours of leaves. We walked to a park close to our school, shuffled through the leaves, selected the right colours and amounts, and headed back to the school to debrief about our findings. 

Outcomes: Listen to and follow instructions, read common nouns, read and understand descriptive adjectives, count items, orally describe items found.

The handout that we used was a bit challenging for my foundation level students. I would adapt it by making a simple chart with one column for the colour, and one column for the number of leaves wanted. 
Upon returning to the classroom, there was some debate as to exactly what colour some leaves were - was it really red, or was it more of an orange? Was it orange or really a yellow? While the answer does not really matter, the language that came out of this discussion was excellent. 

A great follow-up activity would be to do leaf rubbings (see up-coming posting). In the spring, you could a similar activity with colours of flowers or shapes of leaves (e.g. maple versus oak, etc).